Primed Painting of Hydrocal Kits
By: Chris Lyon
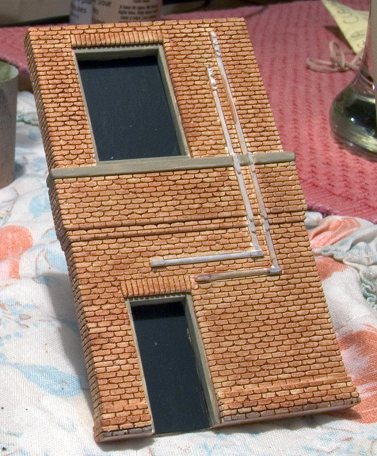
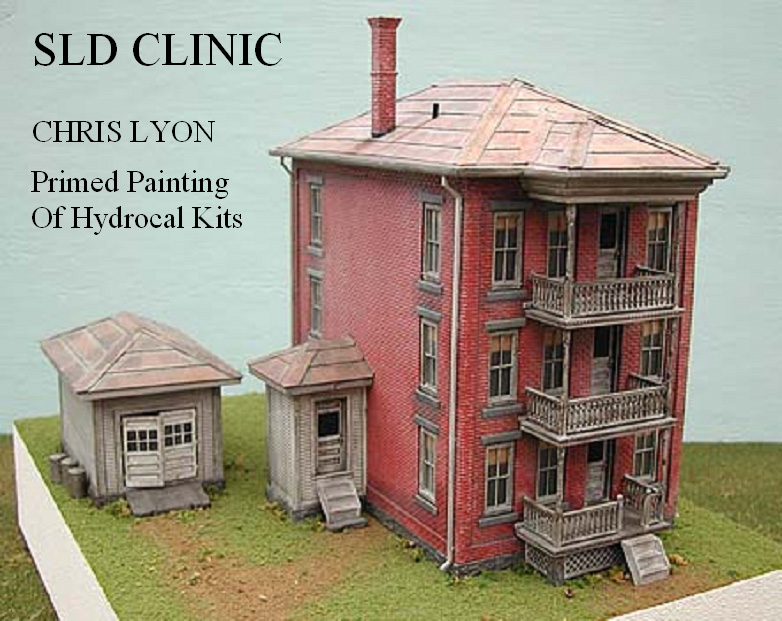 Photo is of the tenament house by Ed Fulasz
Priming the Castings
Now that your castings have been cleaned up and you have repaired any imperfections it is time to do some serious painting. So it is off to Canadian Tire or your favourite supply store to look for acrylic sprays. Krylon is my favourite, as I am familiar with the colours as well as I like the fine nozzle output.
I am looking for colours that will closely match the base colour that you would find on the structure. There is a camouflage line that includes shades of brown (tan, dark brown and red brown). These are great if you are looking to prime brick and wood surfaces. There is an aluminum paint that is great for metal areas such as corrugated roofs. I use white as a way to prepare the surfaces if I want to do a glazing technique from light to dark; more on that later. Finally grey and black are handy depending if you are looking for a warm or cool effect on colours you want over top. Some modellers even use the clear plaster prep, which will seal it completely, and then you can paint it like a plastic building.
Step 1
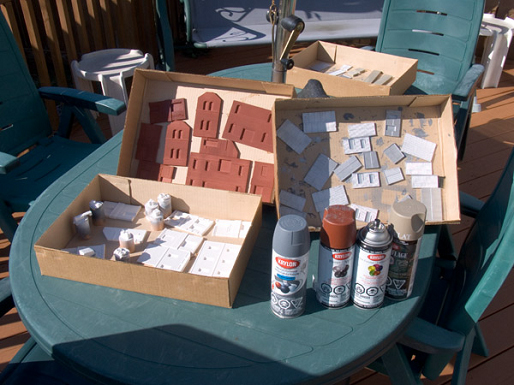 Krylon spray bombs are an easy way to prime
For wood: use Krylon Camo Tan
For Brick: use Red Oxide
For Aluminium: use Grey and then Aluminium
For all (Stone) and detail castings: use White.
Here are some pointers to keep in mind when performing this task:
- To minimize lung damage, spray outdoors or use a spray paint booth. Always use a face mask.
- Let the casting dry thoroughly before handling.
- Use several light coats to minimize paint dribbles/runs.
- “Dust” the paint on so that the porous nature is diminished and not lost completely. This creates consistency.
Some examples of models and prototypes
The following photos are samples of finished products. It is always good to find photos of the effect you want before you start. Make up some hydrocal castings to practice on. You do not want to experiment on your kit.

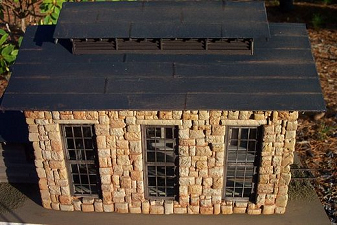
Sample stone building earthy grey.
Sandstone wall – uniform colour.
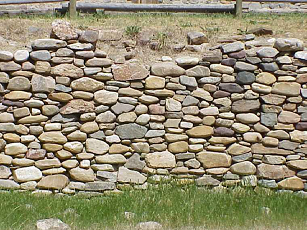
Fieldstone wall – varied colours.

Greystone wall.

Mixed Western stone.
Stone Painting Process
Step 1: Prime with white as you will be working light to dark. You do this so you can control the strength of the colour as it is applied. The only way you can lighten a casting is to drybrush full strength over the dark. By going from light to dark you can see the previous application through the wash or glazing.
Step 2: Make the washes 1 part paint to 5 parts water.
Step 3: Keep to compatible colours either in the browns to yellow or greys to off white.
Step 4: Take lightest colour, apply as a wash. Then the next and the next.
Note: On individual or small groups of stones go over with several washes of the same colour to make it darker, creating variation.
Step 5: Use AI or dark Citadel brand inks in mortar areas if you want it darker than the stones and use wet water and sandstone or mudstone delta acrylic craft paint in the mortar lines for light colours.
Step 6: Dry brush with light stone colour on upper surfaces. This provides visible highlights.
Step 7: Age with chalk or Bragdon’s using grime black and brown. You can darken some stones with Bragdon paste and blend when dry with a stiff brush.
Remember to let each application cure before the next as applying wet on wet can cause blending of the colours. If you want blending go ahead and apply a new layer over the previous wet application.
Steps in Colouring the Stone Wall

Primed wall.

Sandstone.

Brown.

Apply additional layers on some stones.

Smoke.

Wall after the paint has dried.

Coloured with Grey Mudstone.

Age it on the underside of stones.

Darken if you like.

Sandstone mortar.

Colour some stones using colours in the same family. Don’t mix brown and grey.

Dry brush surface to bring out highlights.

Variation can be effective but do not over do it.
Corrugated Metal (Roof)
The process of replicating corrugated iron is very enjoyable. Interestingly there are so many methods to do this it is really ridiculous! You have to determine how old the roofing will be, how dark or varied the rust will be etc. Take pictures of the prototype for reference to duplicate what you want on the model.
When your aluminum sprayed casting is dry, apply Citadel Chestnut or a rust wash of acrylic paint to the surface. Make sure the aluminum shows through. Make the colour stronger on the edges and under surfaces of each sheet of roofing. Also make the colour stronger on some panels than others.
Next take some Raw Umber oil paint and put it on the surfaces that will be weathered the most. This surface can then be hit with rust colour Bragdon powders. Do not brush it in but rather dab or stipple with chunks into the oil paint. You can drag some of this effect upward and add some lighter rust colours.
When dry take a variety of Bragdon rust colours and brush them onto the surface so as to lightly blend everything together. You can use Age It or India ink to add variation.
I recommend you try this on a test piece before tackling the model. Practice makes perfect and it is easier for you to replicate something you have already successfully done.

Here is the finished effect we are after.

The casting primed with grey / aluminum paint.

Chestnut ink wash has been applied.

Close-up illustrating the uneven application with stronger effects along seams and the bottom of each roof section.

Water Based Oil Burnt Umber oil paint.

Dark rust Bragdon’s powder has been applied to the “wet” oil paint.

Another layer of lighter Bragdon’s powders are brushed on the blend everything together.

Indian ink wash applied.

You can add some more dry powders to blend.

Close-up of the final product! Sure looks realistic, doesn’t it?
Recap of the process:
Step 1: Use 1 part ink or acrylic to 5 parts water to create washes over the primed siding.
Step 2: Use Bragdon rust coloured powders, then mineral spirits or denatured alcohol.
Step 3: Use water based oils and more Bragdons.
Step:4: Use alcohol / Indian Ink or Age-it to tone it down.
Brickwork – 2 Approaches
This section deals with two techniques to achieve the brick effect. The first technique involves starting with a brick colour, over painting different colours, aging sections, and blending with powders and adding mortar. The second technique is glazing where you start with a white surface and build up the colours in layers. Then you age add mortar and weather.

Look for samples of brickwork. Find what you like and duplicate it.
Process #1 – Brick Colour
Red Oxide Primed Brick Approach
First step is to prime the brick walls with a paint colour that matches the target brick colour (“red brown“ was used on this example).
 Step 1: Mix Black and Light rust Bragdon’s colours with water to create a paste.
Step 2: Paint individual bricks randomly with this mixture. The wall will look very stark!
Step 3: You may also paint the door and window areas black instead of cutting and filing.
 Step 4: After the paste is dry take a stiff dry brush and blend. This softens the effect by letting some of the bricks pick up the colours of the highlighted ones. The black and light rust will mix with the other bricks and soften the look.
Step 5: You may take fresh Bragdon rusts and lightly Dust areas. The new Brick area shows signs of fresh application
Step 6: Hit with mineral spirits.
Adding the Mortar
 Step 1: Spritz the casting with wet water (a few drops of dish soap in water). Glisten, not saturate.
Step 2: Angle casting for gravity to work.
Step 3: Apply Mudstone From Top bottom with fine brush in Joints and watch it run. Let dry and repeat for stronger effect.
Process #2 – Glazing Techniques
 Sandstone on half of the casting to show effect.
Step: 1 Mix 1 part paint to 5 parts water (Wash or glaze).
Step: 2 Apply light to dark (e.g., Sandstone, Burnt Sienna, Terra Cotta).
 Common Brand of earth colours.
Good for stonework as well.
Acrylics made for Plaster. Very Creamy.
 Sandstone application helps with later variation to glazing.
Paint the windows and door black.
Used mudstone for the concrete sills and window sills.
 Application of the Burnt Sienna Glaze / Stain.
Varying the number of applications creates a variety of finish
I use Mudstone for the windows and trim.
Try Alcohol/India ink or Age-It on a few Bricks.
Adding the Mortar
 Effects of Age-It or Alcohol/India ink as a glaze on some random areas.
Step 1: Spritz the casting with wet water: Glisten, not saturate
Step 2: Angle casting for gravity to work.
Step 3: Apply Mudstone from top to bottom with fine brush in joints and watch it run. Let dry and repeat for stronger effect. Or you could scrape chalk grey or sand-coloured on the casting and rub in with thumb.
When dry, age with alcohol/India ink in random areas such as around windows, under pipes etc.

Finished products.
Painting Detail Parts
The plaster castings are first painted with white primer.
Then use a brown acrylic paint as a first coat and cover all white areas. Let dry and cure.
Then apply brown Bragdon and stipple onto the casting.
Fix using mineral spirits by dabbing small amounts allowing the powder to go into the cracks and melt on the surface. Let dry completely.
Dry brush the edges of the boards and grain with either a flesh or tan-coloured acrylic. Then paint the details on the bench and weather and blend with chalks.
 Primed. The castings are painted using common techniques.
 Paint inside to outside
Step 1: Base coat of brown wood colour over white primer. You can vary this colour to taste. Lighter colours will bring out the wood grain and individual boards better.
 Step 2: Use Stiff old brush and dab in brown Bragdon powder over castings
 Adding mineral spirits or rubbing alcohol using a stippling technique to work it into the cracks and it will also melt the Bragdon powders. This will help bring out details in wood grain and individual boards.
Painting Tips

- Work from the inside out
- Use base colour for each bit
- Use Bragdon pastes for texture and colour
- Apply ink or acrylic washes to rust, dirty areas, etc.
- Use water-based oils then chalk or Bragdons for rusted texture
- Use water-based inks or washes to deepen grain. Dry brush highlights
- e.g., wood (flesh) metal (wetallic silver)

Paint barrels like the prototype.

Apply a dark wash to weather.

Apply inks & Bragdon powders and fix with mineral spirits.

Use alcohol / India ink to age.
Start with bright colours
Then apply dark washes such as browns, blacks or red browns, then watered-down inks.
Then apply Bragdons mineral spirits or chalks with denatured alcohol
Then alcohol / India ink or Age-It.
The following are castings that have been painted following these techniques:


The End